 Sửa máy tính tận nơi tại TP.HCM ⭐GIÁ RẺ ⭐CHẤT LƯỢNG ⭐CHUYÊN NGHIỆP CÔNG TY TNHH TM-DV GIẢI PHÁP TIN HỌC LÊ NGUYỄN
Có thể bạn quan tâm

Khắc phục lỗi full disk 100% Windows 10 trong Task Manager
If your Windows 10 PC has slowed almost to a halt, but you have very few programs open, something may be causing your hard drive to over-work.
This is a problem because when your computer’s hard drive is constantly working at or near 100%, it won’t have any spare capacity to perform other tasks, even routine operating system tasks. This slows everything down, and can make your computer totally unresponsive.
This is a relatively common problem in Windows 10, but luckily, it’s usually not a hard problem to fix. In this article, you’ll find 6 fixes you can try; one is bound to work.
But first, let’s see if 100% disk usage is actually your problem. (If you already know it is, feel free to skip ahead to the fixes.)
Find out if something is causing your Windows 10 hard disk to over-work
Note that the following steps may take some time if your hard drive is being over-worked.
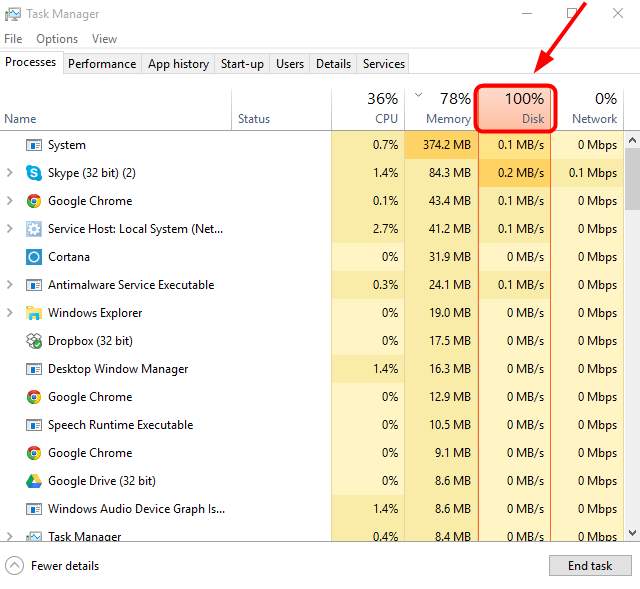
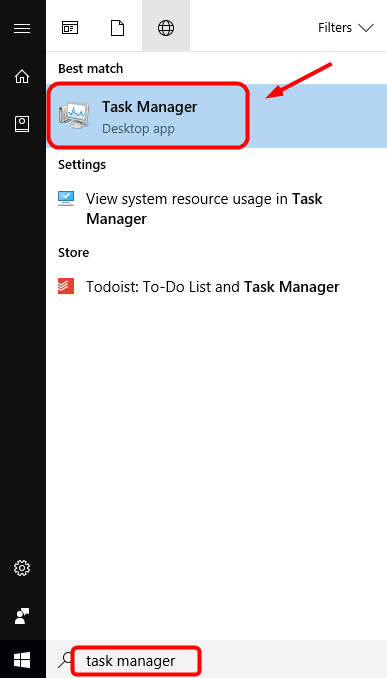
1) Type “task manager” in the Windows search bar and select Task Manager:
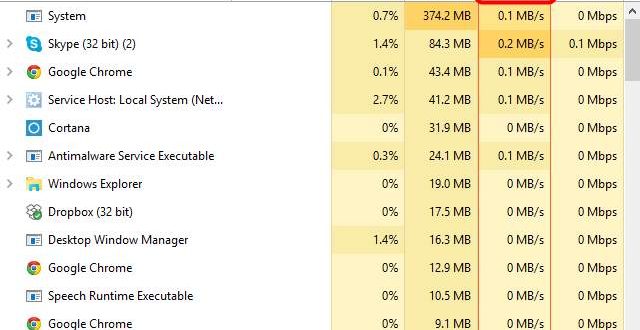
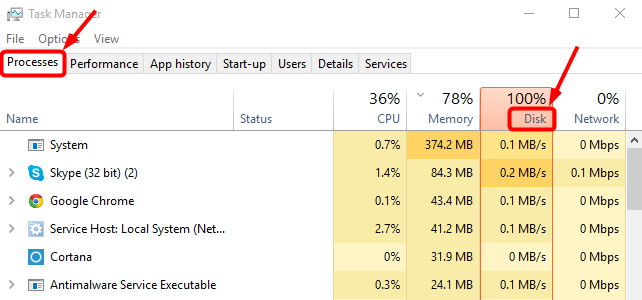
2) In the Processes tab, look at the % at the top of the Disk column. If it’s 100% (or it’s close and it has a red background), something is causing your hard disk to over-work.
Resolve Windows 10 100% disk usage problem
Here are a few repair methods that have helped other users fix their Windows 10 100% disk usage problem. You may not need to try them all; just start at the top of the list and work your way down.
Method 1: Disable Windows Search
To determine if Windows Search is causing your 100% disk usage problem, the first thing you should do is temporarily disable Windows Search, and see if your computer speeds up. If it does, you can permanently disable Windows Search.
Temporarily disable Windows Search
Windows Search is what makes searching files on your PC much faster. If you don’t use it at all, or you have another search app, you can disable it completely. Disabling this service will stop the indexing of all files. But you will still have access to search, which will take longer time.
Here’s how to temporarily disable Windows Search and find out if it’s the cause of your 100% disk utilization problem. (Note that Windows Search will start again when you restart your computer.)
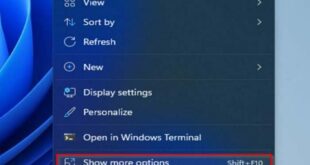
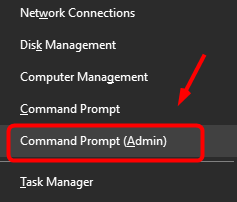
1) On your keyboard, press the Windows logo key ![]() and X at the same time, then selectCommand Prompt (Admin).
and X at the same time, then selectCommand Prompt (Admin).

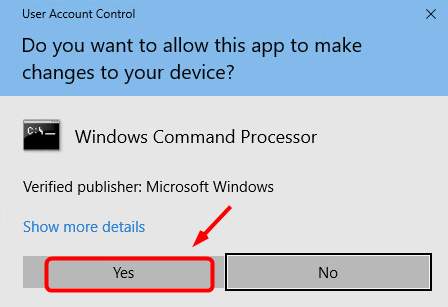
2) Click Yes at the User Account Control window prompt.

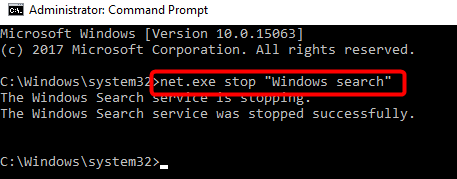
3) A mostly black window will then display. This is the command prompt window. In this window, type in the following command:
net.exe stop "Windows search"
4) Hit Enter on your keyboard.
Check to see if your disk usage and the performance of your computer improve. If they do, you should permanently disable Windows Search as described below. If not, move on to Method 2.
Permanently disable Windows Search
If you discovered that Windows Search is causing your 100% disk usage error in Windows 10, you can permanently disable Windows Search:
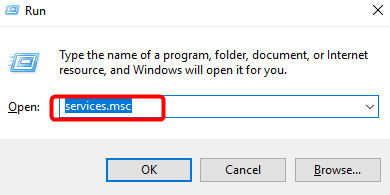
1) Press Windows logo key + R at the same time, and type in services.msc.
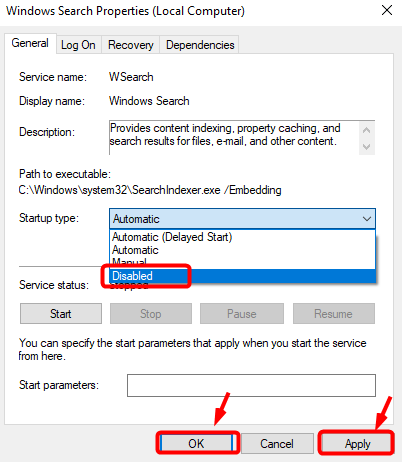
2) Locate Windows Search option, double click it to enter its Properties window.

3) Change the Startup type to Disabled. Then click Apply and OK to save your change.
Method 2: Disable SuperFetch
SuperFetch helps to decrease boot time and make must-load programs more efficiently. However, it has been identified as a potential cause of disk performance issues in Windows 8 and later versions of Windows, including Windows 10. Here’s how to stop this service:
1) On your keyboard, press Windows key and X at the same time, then choose Command Prompt (Admin).

2) Click Yes at the User Account Control prompt.
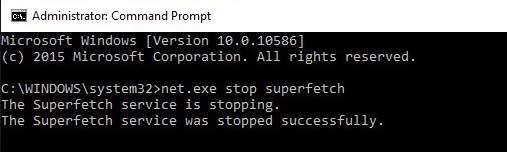
3) The command prompt will once again display. Type in the following command:
net.exe stop superfetch
4) Hit Enter on your keyboard.
Wait for a few minutes to see if your computer starts performing better.
Method 3 – Perform a disk check
1) On your keyboard, press Windows key and X at the same time, then choose Command Prompt (Admin).
2) Click Yes at the User Account Control prompt.

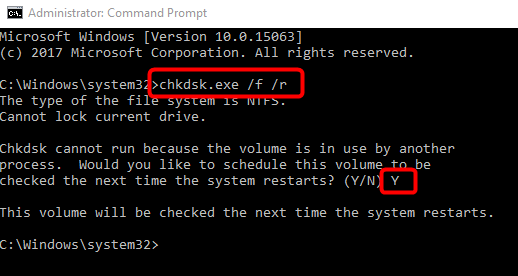
3) The command prompt will once again display. Type in the following command:
chkdsk.exe /f /r
4) Hit Enter on your keyboard, then type Y to confirm that you’d like to perform the disk check the next time you restart your computer. Please make sure you have closed all of your applications first.
IMPORTANT: Disk check will start the next time you boot your PC and it might take some time to complete (could be a day for some). If, when you restart, you don’t have time to wait for the disk check to complete, you can skip it. You’ll need to reschedule it again, as described above, though.
Khắc phục lỗi full disk 100% Windows 10 trong Task Manager
Method 4: Reset Virtual Memory
Virtual memory can be considered an extension of your computer’s physical memory. It’s a combination of RAM and a portion of your hard drive. When the RAM isn’t enough to perform a task, Windows will temporarily store files in virtual memory, then swap them back to RAM when required.
To reset virtual memory:
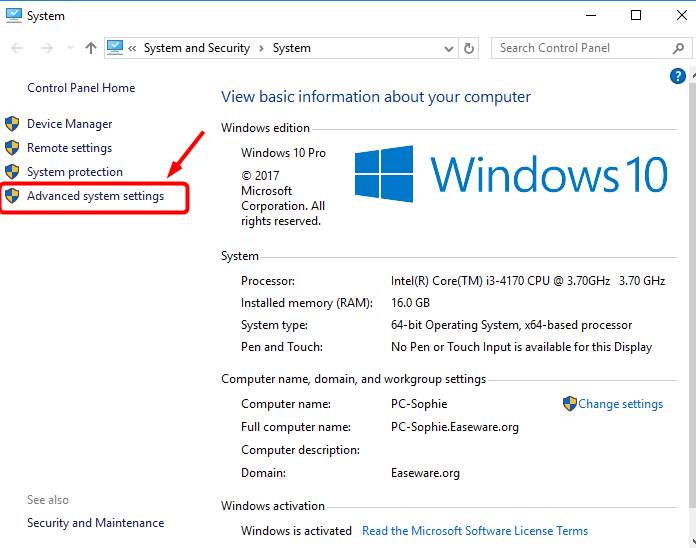
1) On your keyboard, press Windows key and Pause/ Break key at the same time. Then choose Advanced System Settings on the left panel.
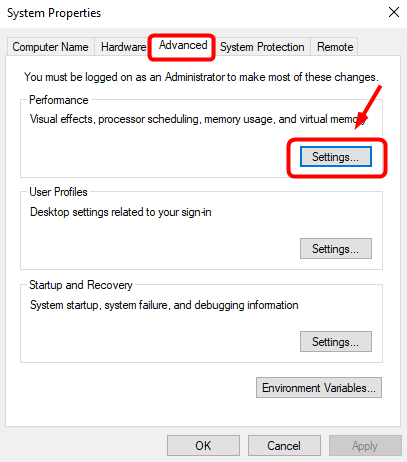
2) Go to the Advanced tab, then click Settings.
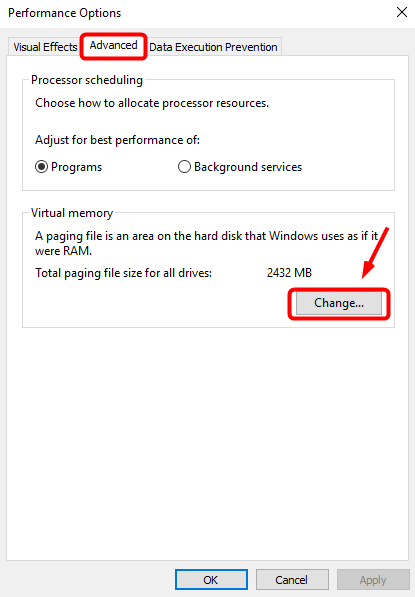
3) Go to the Advanced tab again, and choose Change… in the Virtual memory section.
4) Ensure the Automatically manage paging file size for all drives checkbox is NOT ticked.
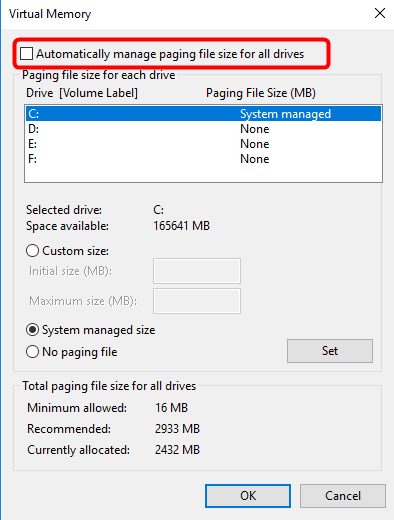
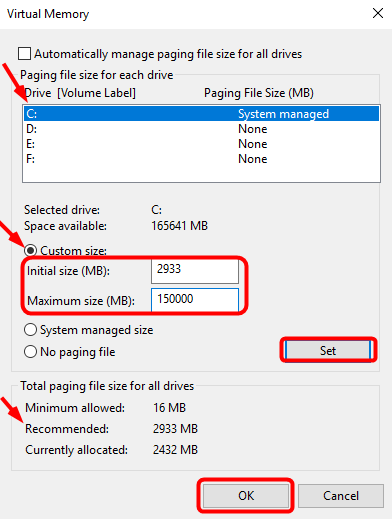
5) Select your windows drive (the hard drive or partition that has Windows installed on it – usually C:), and enter an Initial size and Maximum size for your virtual memory:
- Initial size – This value varies, depending on your computer. If you’re not sure what value to use, just enter whatever the number is in the Recommended category.
- Maximum size – Don’t set this value too high. It should be about 1.5 times the size of your physical RAM. e.g. A PC with 4 GB (4096 MB) of RAM should have no more than about 6,144 MB virtual memory (4096 MB x 1.5).
Once you’ve entered your virtual memory values, click Set, then click OK to continue.
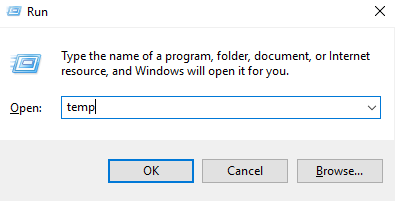
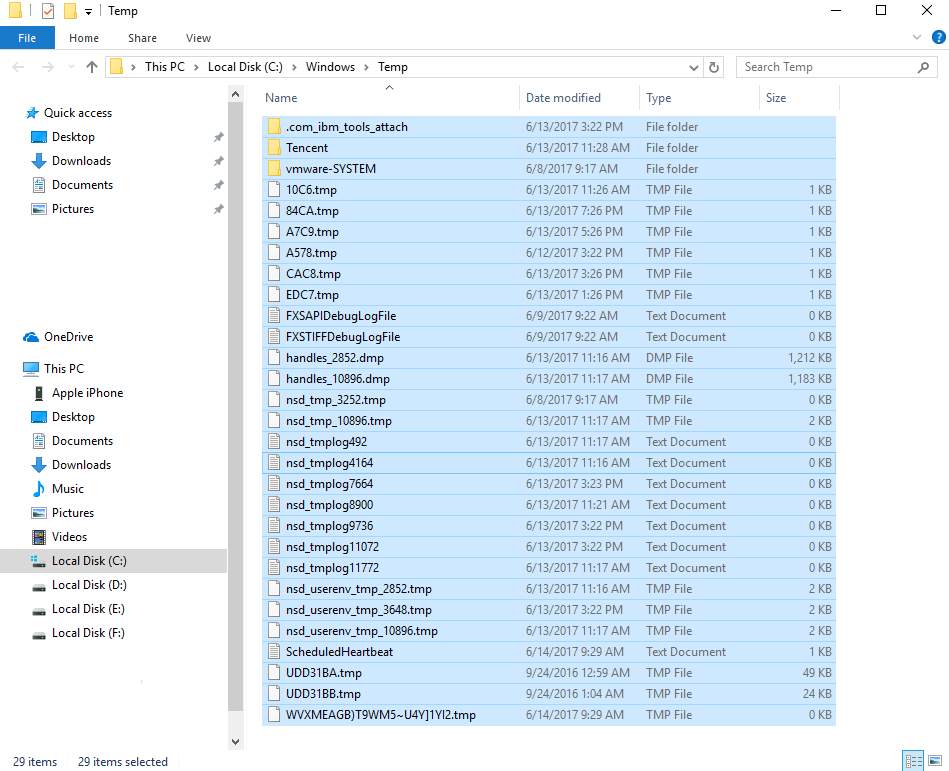
6) Clear all your computer’s ‘temp’ files. On your keyboard, press Windows key and R at the same time, then in the Run form, type temp and hit Enter. This will invoke Windows Explorer with your Temp folder open, showing you all the temp files on your computer.
7) Select all the files in the Temp folder and delete them.
Method 5: Disable Antivirus Software temporarily
If you’ve installed antivirus or anti-malware programs such as Norton, Kaspersky, AVG, or Malwarebytes, you should temporarily turn them off or disable them to see if they’re causing your disk usage problem. If your computer’s disk usage returns to normal when they’re off, you should contact the vendor of the software to see if they can provide some help.
Note that Microsoft has its own default anti-malware, Windows Defender. It’s automatically enabled even if you also have other antivirus applications installed. Even if you disable your other antivirus programs, Windows Defender is always there for you during that certain time range. So, no need to worry too much about temporarily turning antivirus off.
If you use other antivirus and anti-malware systems, please consult their user manuals to learn how to disable them. You might also find these links useful:
How to stop AVG temporarily?
How to disable Avast temporarily?
Method 6: Change the settings in Google Chrome & Skype
For some, a particular combination of Skype and Google Chrome browser settings causes the 100% disk usage problem in Windows 10. Here’s how to fix those settings:
Note that the wording on different versions of Chrome could be slightly different.
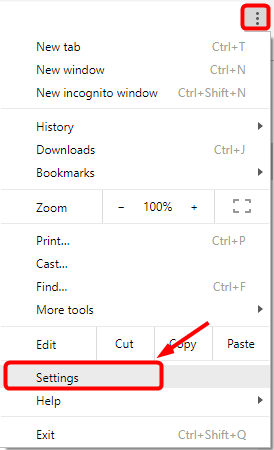
1) In Google Chrome, click the three-dot icon at the top right corner and choose Settings.
2) Scroll down to the bottom of the page and click Advanced.

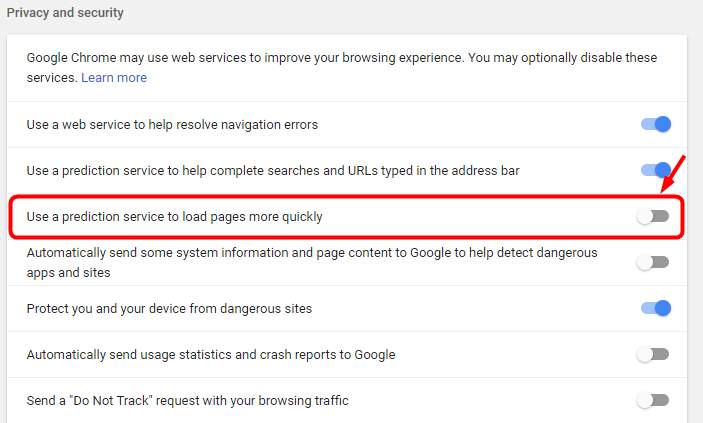
3) In the Privacy and Security category, make sure Use a prediction service to load pages more quickly is turned off.
4) Make sure that your Skype is not running.
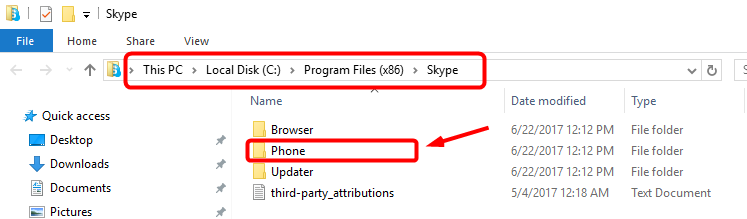
5) In Windows Explorer, go to C:\Program Files (x86)\Skype\Phone\.
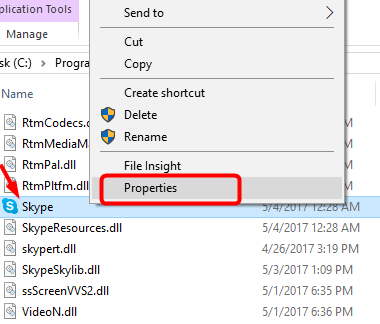
6) Right-click Skype.exe and select Properties.
7) Go to the Security tab and select Edit.
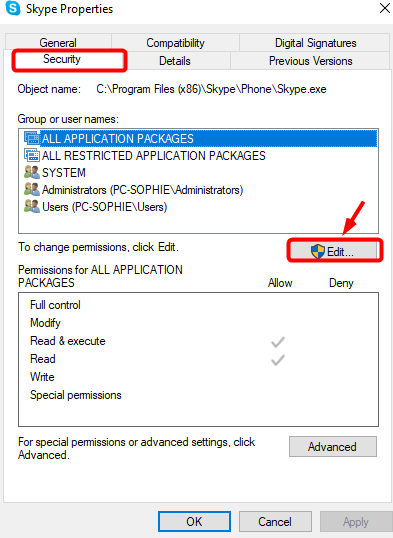
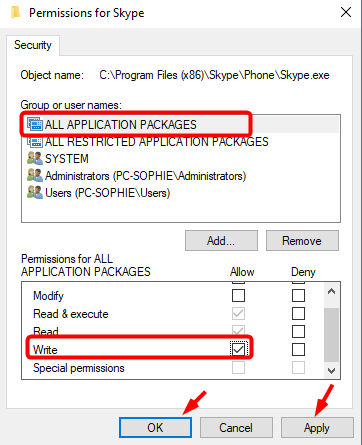
8) Click ALL APPLICATION PACKAGES and tick the Allow checkbox for Write. Then click Apply, then OK to save your change.
Now check your disk usage in Task Manager to see if this has resolved the problem.
Method 7: Fix your StorAHCI.sys driver
Note: A million thanks to our warm-hearted reader Javier for the following solution.
If you have tried all the above methods but still no avail, please see if this additional one helps.
The Windows 10 100% disk usage problem might also be caused by some Advanced Host Controller Interface PCI-Express (AHCI PCIe) models running with the inbox StorAHCI.sys driver due to a firmware bug.
Here’s how to determine if this is your problem and fix it:
1) Open Device Manager by pressing Windows logo key and X at the same time to choose Device Manager.

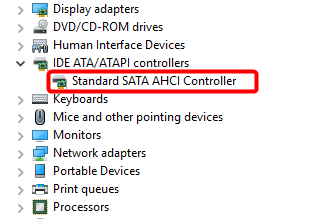
2) Expand the IDE ATA/ATAPI Controllers category, and double-click the AHCI controller.
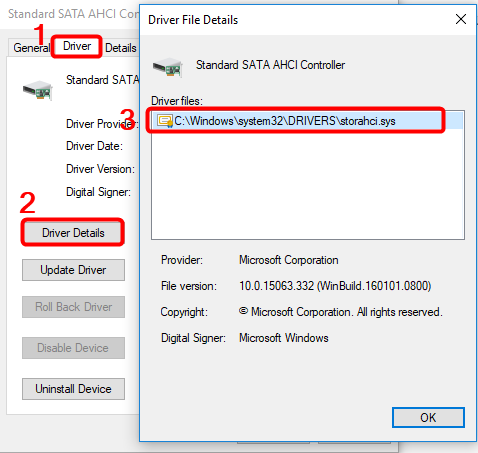
3) Go to the Driver tab and click Driver Details. If you can see storahci.sys stored in a path of system32 folder, then you are running the inbox AHCI driver.
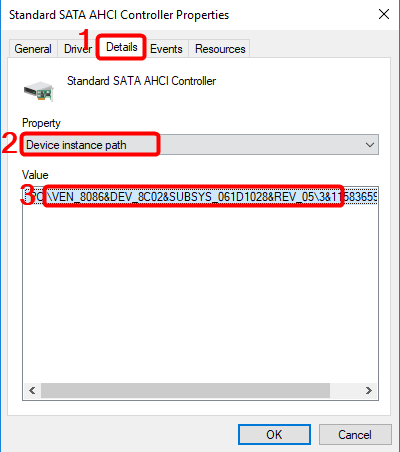
3) Close the Driver Details window and go to Details tab. From the drop-down menu, select Device Instance Path. Make note of the path, starting from VEN_.
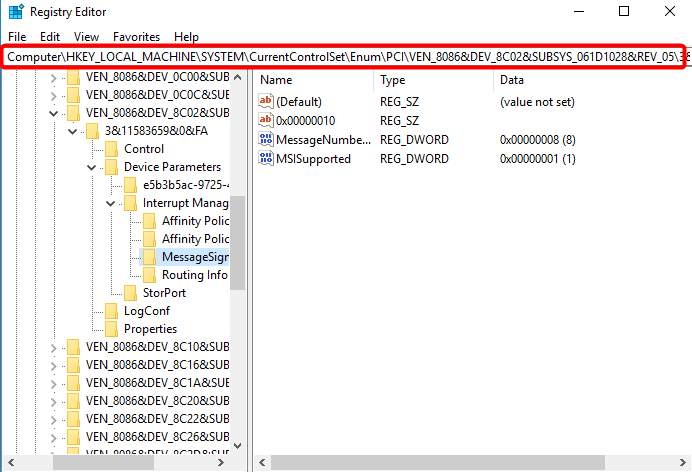
4) Type regedit in the search box of Start panel, then hit Enter on your keyboard to run Registry Editor. Then go to:
HKEY_LOCAL_MACHINE\System\CurrentControlSet\Enum\PCI\ <AHCI Controller>\<Random Number>\Device Parameters\Interrupt Management\MessageSignaledInterruptProperties
The <AHCI Controller> here refers to the name you see from step 2).
The <Random Number> differs on different machines.
5) Double click the MSISupported key and change the value to 0.
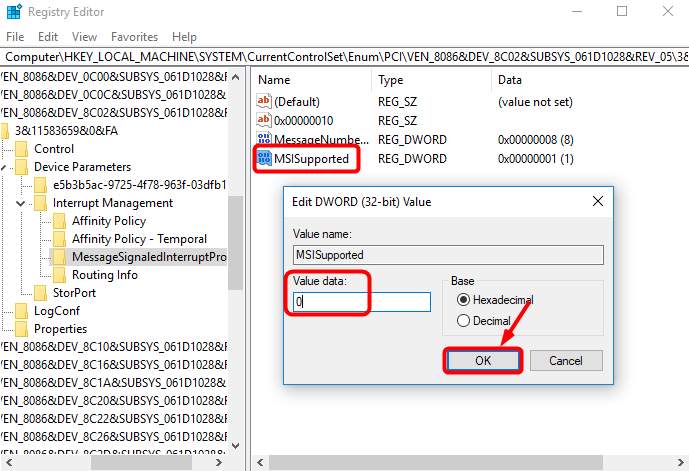
6) Restart your computer after the change.
Method 8: Update your device drivers
If the steps above don’t resolve your 100% disk usage problem in Windows 10, it may be caused by a device driver.
You can automatically update all your device drivers to the latest correct version with Driver Easy.
Driver Easy will automatically recognize your system and find the correct drivers for it. You don’t need to know exactly what system your computer is running, you don’t need to risk downloading and installing the wrong driver, and you don’t need to worry about making a mistake when installing.
You can update your drivers automatically with either the FREE or the Pro version of Driver Easy. But with the Pro version it takes just 2 clicks (and you get full support and a 30-day money back guarantee):
1) Download and install Driver Easy.
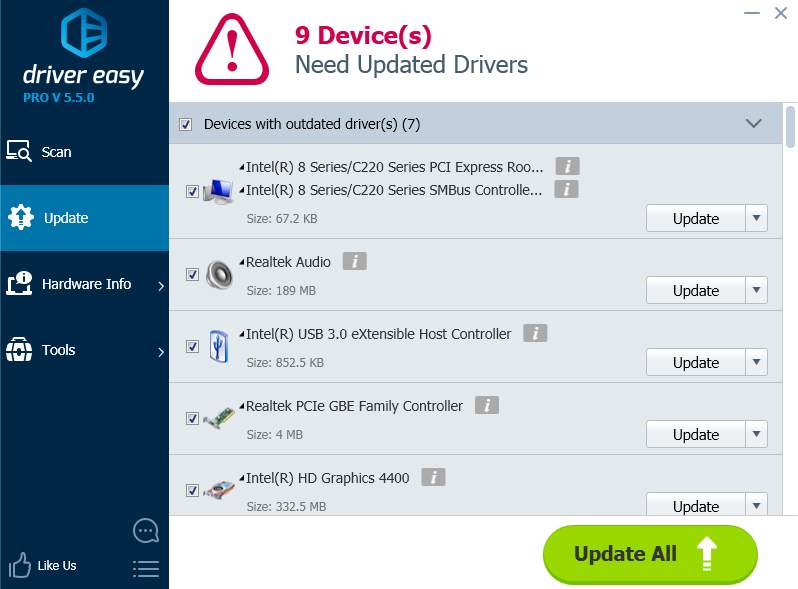
2) Run Driver Easy and click Scan Now button. Driver Easy will then scan your computer and detect any problem drivers.

3) Click the Update button next to any flagged drivers to automatically download and install the correct version of that driver (you can do this with the FREE version). Or click Update All to automatically download and install the correct version of all the drivers that are missing or out of date on your system (this requires the Pro version – you’ll be prompted to upgrade when you click Update All).
Nguồn: drivereasy.com