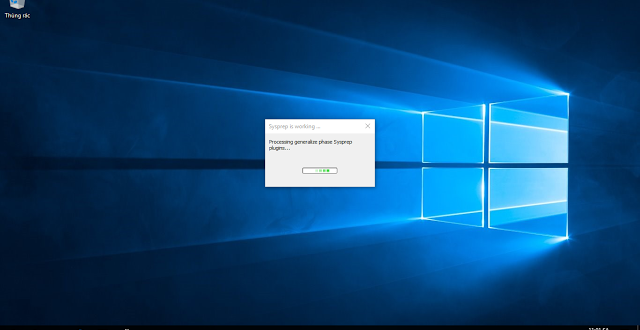
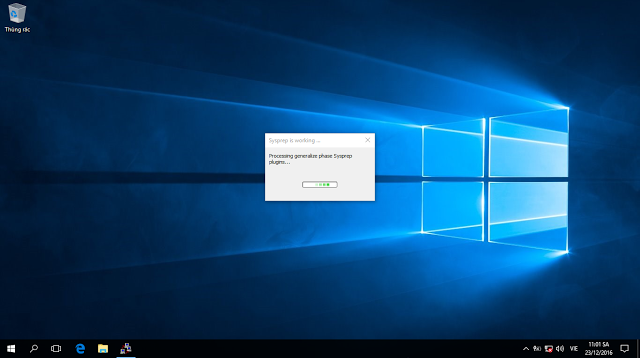
Để triển khai một hình ảnh Windows 10 cho các máy tính cá nhân khác nhau đến người dùng cuối, trước tiên bạn phải chuẩn bị hình ảnh để triển khai. Bạn có thể sử dụng công cụ hệ thống Sysprep chuẩn bị hoặc bạn có thể chỉ định một thiết lập trong tập tin trả lời để chuẩn bị hình ảnh như là một phần của tiến trình cài đặt tự động. Để chuẩn bị hình ảnh mới, bạn phải loại bỏ các thông tin dành riêng cho máy tính từ hình ảnh đã triển khai. Quá trình này được gọi là tổng quát hóa hình ảnh.
Khái quát một hình ảnh
Khi bạn khái quát một hình ảnh Windows, hệ thống sẽ xử lý các thiết lập trong generalize configuration pass. Bạn phải chạy lệnh Sysprep cùng với tùy chọn /generalize, ngay cả khi máy tính kỹ thuật và các máy tính được triển khai có cấu hình phần cứng tương tự. Các lệnh Sysprep /generalize sẽ loại bỏ tất cả thông tin từ một cài đặt Windows đã triển khai bao gồm drivers, tùy chỉnh… để bạn có thể tái sử dụng hình ảnh Windows một cách an toàn trên các máy tính khác nhau. Tuy nhiên, bạn có thể cấu hình tùy chọn generalize kết hợp với sử dụng tập tin trả lời để tạo và triển khai hình ảnh mới trên các máy tính khác nhau cài đặt hoàn toàn tự động và giữ lại các thiết lập mà bạn muốn giữ lại.
Quan trọng:
1. Điều kiện bắt buộc để có thể chạy được Sysprep bằng 2 phương pháp sau:
- Trong chế độ Audit: Xem bài viết chi tiết tại đây
- Trong chế độ OOBE nhưng tài khoản phải là Administrator để đảm bảo rằng sau khi chạy Sysprep tài khoản Administrator sẽ bị tắt để chuẩn bị cho việc đăng ký sử dụng bằng tài khoản mới trên một máy tính khác.
2. Không sử dụng Windows Store để cập nhật ứng dụng hay cài đặt ứng dụng mới trước khi chạy sysprep với lựa chọn /generalize. SysPrep không khái quát về hình ảnh trong trường hợp này. Vấn đề này cũng áp dụng cho các ứng dụng Windows Store (ví dụ: thư, bản đồ, Bing Finance, Bing News, và những ứng dụng khác). Điều này có thể xảy ra khi bạn tuỳ chỉnh cài đặt của bạn trong chế độ Audit. Các lỗi sau xuất hiện trong các tập tin sysprep log %WINDIR%\System32\Sysprep\Panther với thông báo lỗi:
<package name> was installed for a user, but not provisioned for all users. This package will not function properly in the sysprep image.
Sysprep / generalize yêu cầu tất cả các ứng dụng phải được cung cấp cho tất cả người dùng. Tuy nhiên, khi bạn cập nhật một ứng dụng từ Windows Store, ứng dụng trở nên không cung cấp và được gắn riêng cho một tài khoản cụ thể.
Chính vì nguyên nhân đó Windows mới luôn luôn khóa tài khoản Aministrator không cho phép mở ứng dụng Metro UI. Nếu bạn gặp phải lỗi khi chạy Sysprep bạn có thể xem các giải quyết theo bài viết
3. Khi Windows khởi động vào chế độ Audit thì tài khoản có tên defaultuser0 sẽ luôn được bật cùng với tài khoản Administrator. Nếu bạn chạy Sysprep thì tài khoản Administrator sẽ bị tắt nhưng tài khoản defaultuser0 lại không bị tắt. Do đó bạn có thể tắt tài khoản này đi bằng cách khởi chạy dấu nhắc lệnh bằng quyền quản trị viện gõ dòng lệnh bên dưới vào cmd
net user defaultuser0 /active:no
Hướng dẫn tạo tập tin trả lời mẫu
Bạn có thể sử dụng một tập tin trả lời cùng với công cụ Sysprep để cấu hình các thiết lập tự động cài đặt Windows 10. Bài viết này sẽ từng bước mô tả các thiết lập trong quy trình sử dụng tập tin trả lời cùng với Sysprep.
Tập tin trả lời mẫu có dạng Unattend.xml hoặc với một tên khác với nội dụng mẫu như sau:
<?xml version="1.0" encoding="utf-8"?>
    <unattend xmlns="urn:schemas-microsoft-com:unattend">
        Nội dung
    </unattend>
Tập tin trả lời phải được lưu với đuôi xml định dạng All files và được mã hóa Encoding bằng UTF-8. Nội dung trong tập tin trả lời này có thể chia ra làm 2 quá trình một là quá trình cài đặt và hai là tùy chỉnh sau khi cài đặt cho bạn dễ hình dung
Phần 1. Quá trình cài đặt
Để hiểu được quá trình cài đặt nó diễn ra như thế nào tôi sẽ tóm tắt các trình tự sau đây
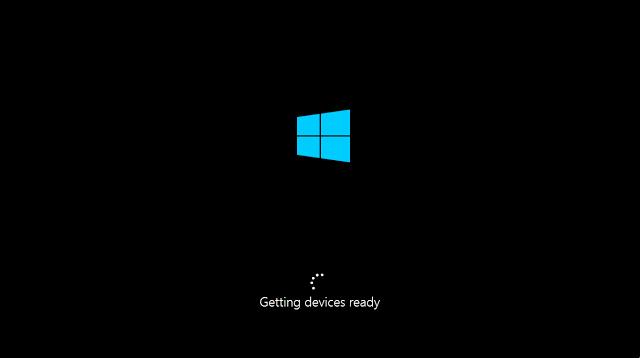
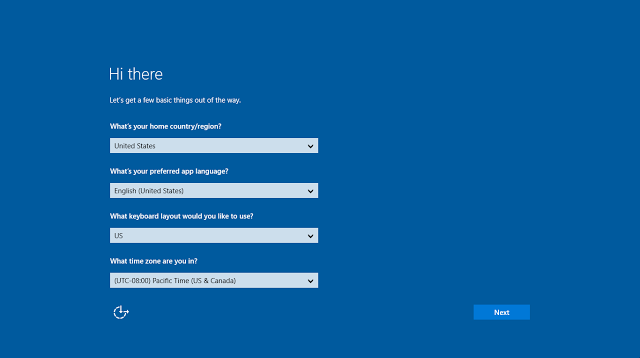
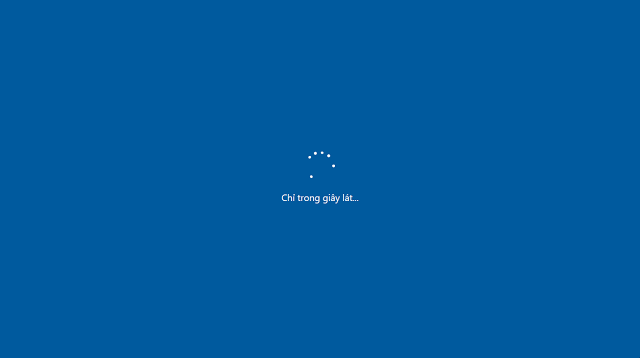
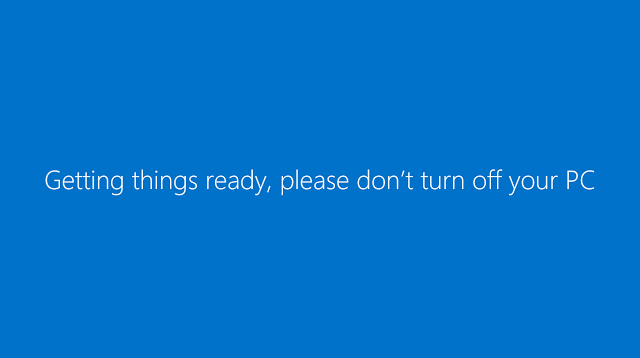
Khi bạn chạy Sysprep và khởi động lại máy Windows 10 sẽ bắt đầu quá trình vào theo trình tự những màn hình sau:
Màn hình nhận dạng thiết bị
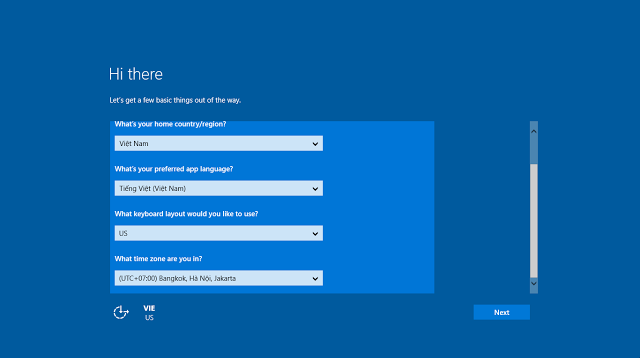
Màn hình chọn ngôn ngữ, keyboard, múi giờ
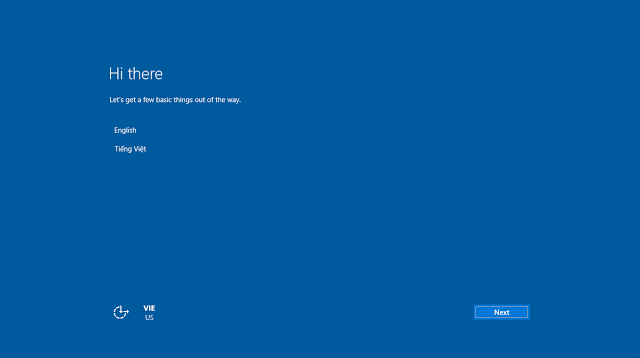
Trường hợp nếu bạn cài thêm ngôn ngữ khác ngoài ngôn ngữ mặc định thì màn hình sẽ xuất hiện thêm ngôn ngữ khác cho bạn lựa chọn
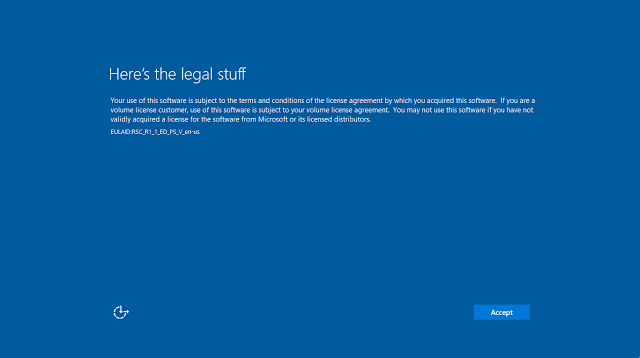
Màn hình chấp nhận điều khoản sử dụng của Microsoft
Màn hình kết nối mạng wifi nếu sử dụng Laptop hay PC có gắn card wifi
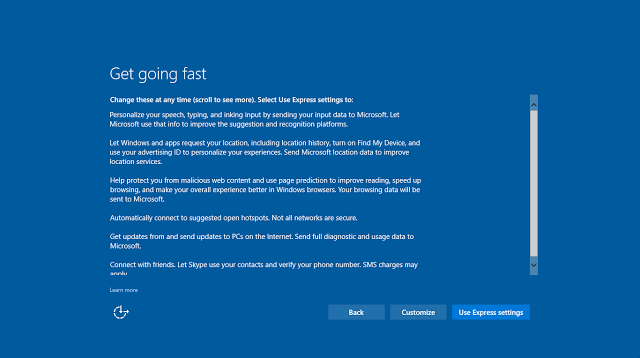
Màn hình OOBE
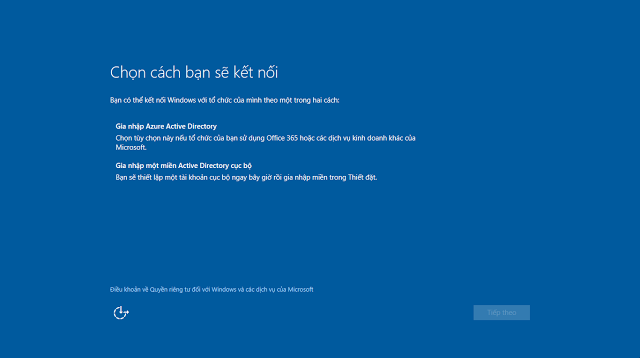
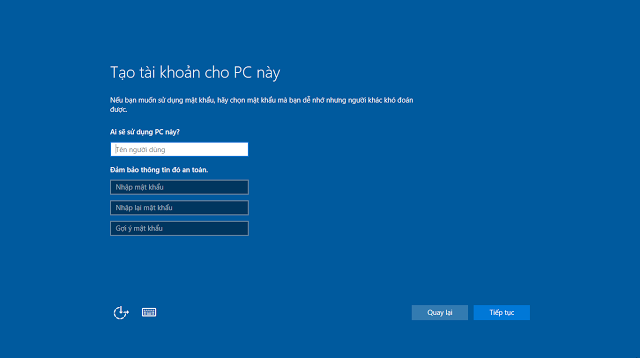
Màn hình đăng ký thông tin tài khoản trường hợp có kết nối mạng là màn hình đăng nhập tài khoản Microsoft, bạn cũng có thể bỏ qua và lựa chọn đăng ký bằng tài khoản cục bộ. Trường hợp không có kết nối mạng sẽ là màn hình đăng ký tài khoản cục bộ Local Account. Nếu Window 10 phiên bản Enterprise hay Education sẽ có màn hình lựa chọn tham gia tổ chức Azure Active Directory hay tên miền Active Directory cục bộ
Màn hình hoạt họa animation
Màn hình nhập mã khóa kích hoạt sản phẩm product key trong trường hợp bạn không sử dụng một mã khóa kích hoạt từ trước Tuy nhiên bản có thể bỏ qua màn hình này bằng cách nhấn Skip this step.
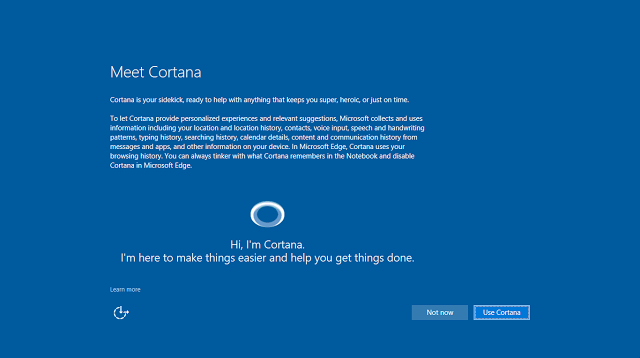
Màn hình cho phép sử dụng Cortana. Nếu sử dụng ngôn ngữ không được Cortana hỗ trợ sẽ không có màn hình này.
Màn hình Microsoft consumer experience
Như vậy qua tất cả màn hình trên chúng ta có thể thấy được có màn hình tự đổng chuyển qua nhưng có màn hình bắt buộc phải có tác động của người dùng thì nó mới chuyển qua màn hình khác. Vậy để những màn hình phải tác động từ người dùng đăng ký chúng ta phải tạo trước nội dung trong tập tin trả lời tự động.
<?xml version="1.0" encoding="utf-8"?>
    <unattend xmlns="urn:schemas-microsoft-com:unattend">
        <settings pass="offlineServicing">
            <component name="Microsoft-Windows-LUA-Settings" processorArchitecture="x86" publicKeyToken="31bf3856ad364e35" language="neutral" versionScope="nonSxS" xmlns:wcm="https://schemas.microsoft.com/WMIConfig/2002/State" xmlns:xsi="https://www.w3.org/2001/XMLSchema-instance">
                <EnableLUA>true</EnableLUA>
            </component>
        </settings>
        <settings pass="offlineServicing">
            <component name="Microsoft-Windows-LUA-Settings" processorArchitecture="amd64" publicKeyToken="31bf3856ad364e35" language="neutral" versionScope="nonSxS" xmlns:wcm="https://schemas.microsoft.com/WMIConfig/2002/State" xmlns:xsi="https://www.w3.org/2001/XMLSchema-instance">
                <EnableLUA>true</EnableLUA>
            </component>
        </settings>
        <settings pass="specialize">
            <component name="Microsoft-Windows-International-Core" processorArchitecture="x86" publicKeyToken="31bf3856ad364e35" language="neutral" versionScope="nonSxS" xmlns:wcm="https://schemas.microsoft.com/WMIConfig/2002/State" xmlns:xsi="https://www.w3.org/2001/XMLSchema-instance">
                <InputLocale>0409:00000409</InputLocale>
                <SystemLocale>en-US</SystemLocale>
                <UILanguage>en-US</UILanguage>
                <UILanguageFallback>en-US</UILanguageFallback>
                <UserLocale>en-US</UserLocale>
            </component>
            <component name="Microsoft-Windows-International-Core" processorArchitecture="amd64" publicKeyToken="31bf3856ad364e35" language="neutral" versionScope="nonSxS" xmlns:wcm="https://schemas.microsoft.com/WMIConfig/2002/State" xmlns:xsi="https://www.w3.org/2001/XMLSchema-instance">
                <InputLocale>0409:00000409</InputLocale>
                <SystemLocale>en-US</SystemLocale>
                <UILanguage>en-US</UILanguage>
                <UILanguageFallback>en-US</UILanguageFallback>
                <UserLocale>en-US</UserLocale>
            </component>
            <component name="Microsoft-Windows-Shell-Setup" processorArchitecture="x86" publicKeyToken="31bf3856ad364e35" language="neutral" versionScope="nonSxS" xmlns:wcm="https://schemas.microsoft.com/WMIConfig/2002/State" xmlns:xsi="https://www.w3.org/2001/XMLSchema-instance">
                <ProductKey>PRODUCT KEY</ProductKey>
            </component>
            <component name="Microsoft-Windows-Shell-Setup" processorArchitecture="amd64" publicKeyToken="31bf3856ad364e35" language="neutral" versionScope="nonSxS" xmlns:wcm="https://schemas.microsoft.com/WMIConfig/2002/State" xmlns:xsi="https://www.w3.org/2001/XMLSchema-instance">
                <ProductKey>PRODUCT KEY</ProductKey>
            </component>
        </settings>
        <settings pass="oobeSystem">
            <component name="Microsoft-Windows-Shell-Setup" processorArchitecture="x86" publicKeyToken="31bf3856ad364e35" language="neutral" versionScope="nonSxS" xmlns:wcm="https://schemas.microsoft.com/WMIConfig/2002/State" xmlns:xsi="https://www.w3.org/2001/XMLSchema-instance">
                <AutoLogon>
                    <Password>
                        <Value></Value>
                        <PlainText>true</PlainText>
                    </Password>
                    <Enabled>true</Enabled>
                    <Username>USER NAME</Username>
                </AutoLogon>
                <OOBE>
                    <HideEULAPage>true</HideEULAPage>
                    <HideOEMRegistrationScreen>true</HideOEMRegistrationScreen>
                    <HideOnlineAccountScreens>true</HideOnlineAccountScreens>
                    <HideWirelessSetupInOOBE>true</HideWirelessSetupInOOBE>
                    <NetworkLocation>Work</NetworkLocation>
                    <SkipUserOOBE>true</SkipUserOOBE>
                    <SkipMachineOOBE>true</SkipMachineOOBE>
                    <ProtectYourPC>1</ProtectYourPC>
                </OOBE>
                <UserAccounts>
                    <LocalAccounts>
                        <LocalAccount wcm:action="add">
                            <Password>
                                <Value></Value>
                                <PlainText>true</PlainText>
                            </Password>
                            <Description></Description>
                            <DisplayName>USER NAME</DisplayName>
                            <Group>Administrators</Group>
                            <Name>USER NAME</Name>
                        </LocalAccount>
                    </LocalAccounts>
                </UserAccounts>
                <TimeZone>TIMEZONE</TimeZone>
            </component>
            <component name="Microsoft-Windows-Shell-Setup" processorArchitecture="amd64" publicKeyToken="31bf3856ad364e35" language="neutral" versionScope="nonSxS" xmlns:wcm="https://schemas.microsoft.com/WMIConfig/2002/State" xmlns:xsi="https://www.w3.org/2001/XMLSchema-instance">
                <AutoLogon>
                    <Password>
                        <Value></Value>
                        <PlainText>true</PlainText>
                    </Password>
                    <Enabled>true</Enabled>
                    <Username>USER NAME</Username>
                </AutoLogon>
                <OOBE>
                    <HideEULAPage>true</HideEULAPage>
                    <HideOEMRegistrationScreen>true</HideOEMRegistrationScreen>
                    <HideOnlineAccountScreens>true</HideOnlineAccountScreens>
                    <HideWirelessSetupInOOBE>true</HideWirelessSetupInOOBE>
                    <NetworkLocation>Work</NetworkLocation>
                    <SkipUserOOBE>true</SkipUserOOBE>
                    <SkipMachineOOBE>true</SkipMachineOOBE>
                    <ProtectYourPC>1</ProtectYourPC>
                </OOBE>
                <UserAccounts>
                    <LocalAccounts>
                        <LocalAccount wcm:action="add">
                            <Password>
                                <Value></Value>
                                <PlainText>true</PlainText>
                            </Password>
                            <Description></Description>
                            <DisplayName>USER NAME</DisplayName>
                            <Group>Administrators</Group>
                            <Name>USER NAME</Name>
                        </LocalAccount>
                    </LocalAccounts>
                </UserAccounts>
                <TimeZone>TIMEZONE</TimeZone>
            </component>
        </settings>
    </unattend>
Bỏ qua màn hình hoạt họa, màn hình sử dụng Cortana và màn hình Microsoft consumer experience mở trình quản lý Local Group Policy (gpedit.msc)
Tắt màn hình hoạt họa
Computer Configuration > Administrative Templates > System > Logon > Show first sign-in animation = Disabled
Tắt màn hình sử dụng Cortana
Computer Configuration > Administrative Templates > Windows Components > Search > Allow Cortana = Disabled
Tắt màn hình Microsoft consumer experience
Computer Configuration > Administrative Templates > Windows Components > Cloud Content > Turn off Microsoft consumer experience = Enabled
Phần 2: Tùy chỉnh
Bạn có thể thiết lập giữ lại các tùy chỉnh Windows như giữ lại trình điều khiển drivers đã cài đặt trên máy để triển khai trên máy tính khác có cùng cấu hình phần cứng. giữ lại các lối tắt của phần mềm đã cài trên desktop, giữ lại các ứng dụng đã ghim trong Start menu, Thêm thông tin cá nhân vào hộp thoại System Properties, thay tên máy tính. Thay đổi hình nền desktop, ghim phần mềm hoặc ứng dụng xuống thanh tác vụ. …. Tất cả các thiết lập này được mô tả trong nội dung tập tin trả lời
Giữ lại trình điều khiển drivers
<settings pass="generalize">
        <component name="Microsoft-Windows-PnpSysprep" processorArchitecture="amd64" publicKeyToken="31bf3856ad364e35" language="neutral" versionScope="nonSxS" xmlns:wcm="https://schemas.microsoft.com/WMIConfig/2002/State" xmlns:xsi="https://www.w3.org/2001/XMLSchema-instance">
            <PersistAllDeviceInstalls>true</PersistAllDeviceInstalls>
            <DoNotCleanUpNonPresentDevices>true</DoNotCleanUpNonPresentDevices>
        </component>
        <component name="Microsoft-Windows-PnpSysprep" processorArchitecture="x86" publicKeyToken="31bf3856ad364e35" language="neutral" versionScope="nonSxS" xmlns:wcm="https://schemas.microsoft.com/WMIConfig/2002/State" xmlns:xsi="https://www.w3.org/2001/XMLSchema-instance">
            <PersistAllDeviceInstalls>true</PersistAllDeviceInstalls>
            <DoNotCleanUpNonPresentDevices>true</DoNotCleanUpNonPresentDevices>
        </component>
    </settings>
Giữ lại các lối tắt của phần mềm đã cài trên desktop, giữ lại các ứng dụng đã ghim trong Start menu, Thêm thông tin cá nhân vào hộp thoại System Properties, thay tên máy tính
        <settings pass="generalize">
            <component name="Microsoft-Windows-Shell-Setup" processorArchitecture="x86" publicKeyToken="31bf3856ad364e35" language="neutral" versionScope="nonSxS" xmlns:wcm="https://schemas.microsoft.com/WMIConfig/2002/State" xmlns:xsi="https://www.w3.org/2001/XMLSchema-instance">
                <CopyProfile>true</CopyProfile>
             <OEMInformation>
                    <Manufacturer>COMPANY NAME</Manufacturer>
                    <Model>MODEL</Model>
        <SupportHours>SUPPORT HOURS</SupportHours>
                    <SupportPhone>SUPPORT PHONE</SupportPhone>
                    <SupportURL>SUPPORT WEBSITE</SupportURL>
                    <Logo>%windir%\system32\oobe\Logo.bmp</Logo>
                </OEMInformation>
                <ComputerName>COMPUTER NAME</ComputerName>
                <ProductKey>PRODUCT KEY</ProductKey>
            </component>
            <component name="Microsoft-Windows-Shell-Setup" processorArchitecture="amd64" publicKeyToken="31bf3856ad364e35" language="neutral" versionScope="nonSxS" xmlns:wcm="https://schemas.microsoft.com/WMIConfig/2002/State" xmlns:xsi="https://www.w3.org/2001/XMLSchema-instance">
                <CopyProfile>true</CopyProfile>
             <OEMInformation>
                    <Manufacturer>COMPANY NAME</Manufacturer>
                    <Model>MODEL</Model>
        <SupportHours>SUPPORT HOURS</SupportHours>
                    <SupportPhone>SUPPORT PHONE</SupportPhone>
                    <SupportURL>SUPPORT WEBSITE</SupportURL>
                    <Logo>%windir%\system32\oobe\Logo.bmp</Logo>
                </OEMInformation>
                <ComputerName>COMPUTER NAME</ComputerName>
                <ProductKey>PRODUCT KEY</ProductKey>
            </component>
        </settings>
Thay đổi hình nền desktop, ghim phần mềm hoặc ứng dụng xuống thanh tác vụ.
<settings pass="oobeSystem">
            <component name="Microsoft-Windows-Shell-Setup" processorArchitecture="x86" publicKeyToken="31bf3856ad364e35" language="neutral" versionScope="nonSxS" xmlns:wcm="https://schemas.microsoft.com/WMIConfig/2002/State" xmlns:xsi="https://www.w3.org/2001/XMLSchema-instance">
                <RegisteredOrganization>ORGANIZATION</RegisteredOrganization>
                <RegisteredOwner>USER NAME</RegisteredOwner>
  <Themes>
                    <DesktopBackground>%windir%\system32\oobe\Background.png</DesktopBackground>
                    <ThemeName>THEME NAME</ThemeName>
                </Themes>
                <TaskbarLinks>
                    <Link0></Link0>
                    <Link1></Link1>
                    <Link2></Link2>
                </TaskbarLinks>
          <FolderLocations>
                    <ProfilesDirectory>C:\Users</ProfilesDirectory>
                </FolderLocations>
            </component>
            <component name="Microsoft-Windows-Shell-Setup" processorArchitecture="amd64" publicKeyToken="31bf3856ad364e35" language="neutral" versionScope="nonSxS" xmlns:wcm="https://schemas.microsoft.com/WMIConfig/2002/State" xmlns:xsi="https://www.w3.org/2001/XMLSchema-instance">                       <RegisteredOrganization>ORGANIZATION</RegisteredOrganization>
                <RegisteredOwner>USER NAME</RegisteredOwner>
  <Themes>
                    <DesktopBackground>%windir%\system32\oobe\Background.png</DesktopBackground>
                    <ThemeName>THEME NAME</ThemeName>
                </Themes>
                <TaskbarLinks>
                    <Link0></Link0>
                    <Link1></Link1>
                    <Link2></Link2>
                </TaskbarLinks>
    <FolderLocations>
                    <ProfilesDirectory>C:\Users</ProfilesDirectory>
                </FolderLocations>
            </component>
        </settings>
Như vậy tổng hợp từ phần 1 và phần 2 chúng ta sẽ tạo ra một tập tin trả lời hoản chỉnh cho cả hai nền tảng x86 và x64
<?xml version="1.0" encoding="utf-8"?>
    <unattend xmlns="urn:schemas-microsoft-com:unattend">
        <settings pass="offlineServicing">
            <component name="Microsoft-Windows-LUA-Settings" processorArchitecture="x86" publicKeyToken="31bf3856ad364e35" language="neutral" versionScope="nonSxS" xmlns:wcm="https://schemas.microsoft.com/WMIConfig/2002/State" xmlns:xsi="https://www.w3.org/2001/XMLSchema-instance">
                <EnableLUA>true</EnableLUA>
            </component>
        </settings>
        <settings pass="offlineServicing">
            <component name="Microsoft-Windows-LUA-Settings" processorArchitecture="amd64" publicKeyToken="31bf3856ad364e35" language="neutral" versionScope="nonSxS" xmlns:wcm="https://schemas.microsoft.com/WMIConfig/2002/State" xmlns:xsi="https://www.w3.org/2001/XMLSchema-instance">
                <EnableLUA>true</EnableLUA>
            </component>
        </settings>
        <settings pass="specialize">
            <component name="Microsoft-Windows-International-Core" processorArchitecture="x86" publicKeyToken="31bf3856ad364e35" language="neutral" versionScope="nonSxS" xmlns:wcm="https://schemas.microsoft.com/WMIConfig/2002/State" xmlns:xsi="https://www.w3.org/2001/XMLSchema-instance">
                <InputLocale>0409:00000409</InputLocale>
                <SystemLocale>en-US</SystemLocale>
                <UILanguage>en-US</UILanguage>
                <UILanguageFallback>en-US</UILanguageFallback>
                <UserLocale>en-US</UserLocale>
            </component>
            <component name="Microsoft-Windows-International-Core" processorArchitecture="amd64" publicKeyToken="31bf3856ad364e35" language="neutral" versionScope="nonSxS" xmlns:wcm="https://schemas.microsoft.com/WMIConfig/2002/State" xmlns:xsi="https://www.w3.org/2001/XMLSchema-instance">
                <InputLocale>0409:00000409</InputLocale>
                <SystemLocale>en-US</SystemLocale>
                <UILanguage>en-US</UILanguage>
                <UILanguageFallback>en-US</UILanguageFallback>
                <UserLocale>en-US</UserLocale>
            </component>
            <component name="Microsoft-Windows-Shell-Setup" processorArchitecture="x86" publicKeyToken="31bf3856ad364e35" language="neutral" versionScope="nonSxS" xmlns:wcm="https://schemas.microsoft.com/WMIConfig/2002/State" xmlns:xsi="https://www.w3.org/2001/XMLSchema-instance">
                <CopyProfile>true</CopyProfile>
             <OEMInformation>
                    <Manufacturer>COMPANY NAME</Manufacturer>
                    <Model>MODEL</Model>
        <SupportHours>SUPPORT HOURS</SupportHours>
                    <SupportPhone>SUPPORT PHONE</SupportPhone>
                    <SupportURL>SUPPORT WEBSITE</SupportURL>
                    <Logo>%windir%\system32\oobe\Logo.bmp</Logo>
                </OEMInformation>
                <ComputerName>COMPUTER NAME</ComputerName>
                <ProductKey>PRODUCT KEY</ProductKey>
            </component>
            <component name="Microsoft-Windows-Shell-Setup" processorArchitecture="amd64" publicKeyToken="31bf3856ad364e35" language="neutral" versionScope="nonSxS" xmlns:wcm="https://schemas.microsoft.com/WMIConfig/2002/State" xmlns:xsi="https://www.w3.org/2001/XMLSchema-instance">
                <CopyProfile>true</CopyProfile>
             <OEMInformation>
                    <Manufacturer>COMPANY NAME</Manufacturer>
                    <Model>MODEL</Model>
        <SupportHours>SUPPORT HOURS</SupportHours>
                    <SupportPhone>SUPPORT PHONE</SupportPhone>
                    <SupportURL>SUPPORT WEBSITE</SupportURL>
                    <Logo>%windir%\system32\oobe\Logo.bmp</Logo>
                </OEMInformation>
                <ComputerName>COMPUTER NAME</ComputerName>
                <ProductKey>PRODUCT KEY</ProductKey>
            </component>
        </settings>
        <settings pass="oobeSystem">
            <component name="Microsoft-Windows-Shell-Setup" processorArchitecture="x86" publicKeyToken="31bf3856ad364e35" language="neutral" versionScope="nonSxS" xmlns:wcm="https://schemas.microsoft.com/WMIConfig/2002/State" xmlns:xsi="https://www.w3.org/2001/XMLSchema-instance">
                <AutoLogon>
                    <Password>
                        <Value></Value>
                        <PlainText>true</PlainText>
                    </Password>
                    <Enabled>true</Enabled>
                    <Username>USER NAME</Username>
                </AutoLogon>
                <OOBE>
                    <HideEULAPage>true</HideEULAPage>
                    <HideOEMRegistrationScreen>true</HideOEMRegistrationScreen>
                    <HideOnlineAccountScreens>true</HideOnlineAccountScreens>
                    <HideWirelessSetupInOOBE>true</HideWirelessSetupInOOBE>
                    <NetworkLocation>Work</NetworkLocation>
                    <SkipUserOOBE>true</SkipUserOOBE>
                    <SkipMachineOOBE>true</SkipMachineOOBE>
                    <ProtectYourPC>1</ProtectYourPC>
                </OOBE>
                <UserAccounts>
                    <LocalAccounts>
                        <LocalAccount wcm:action="add">
                            <Password>
                                <Value></Value>
                                <PlainText>true</PlainText>
                            </Password>
                            <Description></Description>
                            <DisplayName>USER NAME</DisplayName>
                            <Group>Administrators</Group>
                            <Name>USER NAME</Name>
                        </LocalAccount>
                    </LocalAccounts>
                </UserAccounts>
                <RegisteredOrganization>ORGANIZATION</RegisteredOrganization>
                <RegisteredOwner>USER NAME</RegisteredOwner>
                <TimeZone>TIMEZONE</TimeZone>
         <Themes>
                    <DesktopBackground>%windir%\system32\oobe\Background.png</DesktopBackground>
                    <ThemeName>THEME NAME</ThemeName>
                </Themes>
                <TaskbarLinks>
                    <Link0></Link0>
                    <Link1></Link1>
                    <Link2></Link2>
                </TaskbarLinks>
          <FolderLocations>
                    <ProfilesDirectory>C:\Users</ProfilesDirectory>
                </FolderLocations>
            </component>
            <component name="Microsoft-Windows-Shell-Setup" processorArchitecture="amd64" publicKeyToken="31bf3856ad364e35" language="neutral" versionScope="nonSxS" xmlns:wcm="https://schemas.microsoft.com/WMIConfig/2002/State" xmlns:xsi="https://www.w3.org/2001/XMLSchema-instance">
                <AutoLogon>
                    <Password>
                        <Value></Value>
                        <PlainText>true</PlainText>
                    </Password>
                    <Enabled>true</Enabled>
                    <Username>USER NAME</Username>
                </AutoLogon>
                <OOBE>
                    <HideEULAPage>true</HideEULAPage>
                    <HideOEMRegistrationScreen>true</HideOEMRegistrationScreen>
                    <HideOnlineAccountScreens>true</HideOnlineAccountScreens>
                    <HideWirelessSetupInOOBE>true</HideWirelessSetupInOOBE>
                    <NetworkLocation>Work</NetworkLocation>
                    <SkipUserOOBE>true</SkipUserOOBE>
                    <SkipMachineOOBE>true</SkipMachineOOBE>
                    <ProtectYourPC>1</ProtectYourPC>
                </OOBE>
                <UserAccounts>
                    <LocalAccounts>
                        <LocalAccount wcm:action="add">
                            <Password>
                                <Value></Value>
                                <PlainText>true</PlainText>
                            </Password>
                            <Description></Description>
                            <DisplayName>USER NAME</DisplayName>
                            <Group>Administrators</Group>
                            <Name>USER NAME</Name>
                        </LocalAccount>
                    </LocalAccounts>
                </UserAccounts>
                <RegisteredOrganization>ORGANIZATION</RegisteredOrganization>
                <RegisteredOwner>USER NAME</RegisteredOwner>
                <TimeZone>TIMEZONE</TimeZone>
  <Themes>
                    <DesktopBackground>%windir%\system32\oobe\Background.png</DesktopBackground>
                    <ThemeName>THEME NAME</ThemeName>
                </Themes>
                <TaskbarLinks>
                    <Link0></Link0>
                    <Link1></Link1>
                    <Link2></Link2>
                </TaskbarLinks>
                <FolderLocations>
                    <ProfilesDirectory>C:\Users</ProfilesDirectory>
                </FolderLocations>
            </component>
        </settings>
        <settings pass="generalize">
            <component name="Microsoft-Windows-PnpSysprep" processorArchitecture="amd64" publicKeyToken="31bf3856ad364e35" language="neutral" versionScope="nonSxS" xmlns:wcm="https://schemas.microsoft.com/WMIConfig/2002/State" xmlns:xsi="https://www.w3.org/2001/XMLSchema-instance">
                <PersistAllDeviceInstalls>true</PersistAllDeviceInstalls>
                <DoNotCleanUpNonPresentDevices>true</DoNotCleanUpNonPresentDevices>
            </component>
            <component name="Microsoft-Windows-PnpSysprep" processorArchitecture="x86" publicKeyToken="31bf3856ad364e35" language="neutral" versionScope="nonSxS" xmlns:wcm="https://schemas.microsoft.com/WMIConfig/2002/State" xmlns:xsi="https://www.w3.org/2001/XMLSchema-instance">
                <PersistAllDeviceInstalls>true</PersistAllDeviceInstalls>
                <DoNotCleanUpNonPresentDevices>true</DoNotCleanUpNonPresentDevices>
            </component>
        </settings>
    </unattend>
Bạn có thề tham khảo tập tin mẫu của tôi áp dụng với Windows 10 Enterprise
<?xml version="1.0" encoding="utf-8"?>
    <unattend xmlns="urn:schemas-microsoft-com:unattend">
        <settings pass="offlineServicing">
            <component name="Microsoft-Windows-LUA-Settings" processorArchitecture="x86" publicKeyToken="31bf3856ad364e35" language="neutral" versionScope="nonSxS" xmlns:wcm="https://schemas.microsoft.com/WMIConfig/2002/State" xmlns:xsi="https://www.w3.org/2001/XMLSchema-instance">
                <EnableLUA>true</EnableLUA>
            </component>
        </settings>
        <settings pass="offlineServicing">
            <component name="Microsoft-Windows-LUA-Settings" processorArchitecture="amd64" publicKeyToken="31bf3856ad364e35" language="neutral" versionScope="nonSxS" xmlns:wcm="https://schemas.microsoft.com/WMIConfig/2002/State" xmlns:xsi="https://www.w3.org/2001/XMLSchema-instance">
                <EnableLUA>true</EnableLUA>
            </component>
        </settings>
        <settings pass="specialize">
            <component name="Microsoft-Windows-International-Core" processorArchitecture="x86" publicKeyToken="31bf3856ad364e35" language="neutral" versionScope="nonSxS" xmlns:wcm="https://schemas.microsoft.com/WMIConfig/2002/State" xmlns:xsi="https://www.w3.org/2001/XMLSchema-instance">
                <InputLocale>0409:00000409</InputLocale>
                <SystemLocale>en-US</SystemLocale>
                <UILanguage>en-US</UILanguage>
                <UILanguageFallback>en-US</UILanguageFallback>
                <UserLocale>en-US</UserLocale>
            </component>
            <component name="Microsoft-Windows-International-Core" processorArchitecture="amd64" publicKeyToken="31bf3856ad364e35" language="neutral" versionScope="nonSxS" xmlns:wcm="https://schemas.microsoft.com/WMIConfig/2002/State" xmlns:xsi="https://www.w3.org/2001/XMLSchema-instance">
                <InputLocale>0409:00000409</InputLocale>
                <SystemLocale>en-US</SystemLocale>
                <UILanguage>en-US</UILanguage>
                <UILanguageFallback>en-US</UILanguageFallback>
                <UserLocale>en-US</UserLocale>
            </component>
            <component name="Microsoft-Windows-Shell-Setup" processorArchitecture="x86" publicKeyToken="31bf3856ad364e35" language="neutral" versionScope="nonSxS" xmlns:wcm="https://schemas.microsoft.com/WMIConfig/2002/State" xmlns:xsi="https://www.w3.org/2001/XMLSchema-instance">
                <CopyProfile>true</CopyProfile>
             <OEMInformation>
                    <Manufacturer>Hewlett-Packard©</Manufacturer>
                    <Model>ProBook 4430s</Model>
        <SupportHours>All Days</SupportHours>
                    <SupportPhone>0908-562-750</SupportPhone>
                    <SupportURL>https://www.facebook.com/kequaduongvodanh</SupportURL>
                    <Logo>%windir%\system32\oobe\Logo.bmp</Logo>
                </OEMInformation>
                <ComputerName>HP</ComputerName>
                <ProductKey>VNKK7-79T3J-8JVT9-PKQY9-KQBPF</ProductKey>
            </component>
            <component name="Microsoft-Windows-Shell-Setup" processorArchitecture="amd64" publicKeyToken="31bf3856ad364e35" language="neutral" versionScope="nonSxS" xmlns:wcm="https://schemas.microsoft.com/WMIConfig/2002/State" xmlns:xsi="https://www.w3.org/2001/XMLSchema-instance">
                <CopyProfile>true</CopyProfile>
             <OEMInformation>
                    <Manufacturer>Hewlett-Packard©</Manufacturer>
                    <Model>ProBook 4430s</Model>
        <SupportHours>All Days</SupportHours>
                    <SupportPhone>0908-562-750</SupportPhone>
                    <SupportURL>https://www.facebook.com/kequaduongvodanh</SupportURL>
                    <Logo>%windir%\system32\oobe\Logo.bmp</Logo>
                </OEMInformation>
                <ComputerName>HP</ComputerName>
                <ProductKey>VNKK7-79T3J-8JVT9-PKQY9-KQBPF</ProductKey>
            </component>
        </settings>
        <settings pass="oobeSystem">
            <component name="Microsoft-Windows-Shell-Setup" processorArchitecture="x86" publicKeyToken="31bf3856ad364e35" language="neutral" versionScope="nonSxS" xmlns:wcm="https://schemas.microsoft.com/WMIConfig/2002/State" xmlns:xsi="https://www.w3.org/2001/XMLSchema-instance">
                <AutoLogon>
                    <Password>
                        <Value></Value>
                        <PlainText>true</PlainText>
                    </Password>
                    <Enabled>true</Enabled>
                    <Username>Nguyen Tuan</Username>
                </AutoLogon>
                <OOBE>
                    <HideEULAPage>true</HideEULAPage>
                    <HideOEMRegistrationScreen>true</HideOEMRegistrationScreen>
                    <HideOnlineAccountScreens>true</HideOnlineAccountScreens>
                    <HideWirelessSetupInOOBE>true</HideWirelessSetupInOOBE>
                    <NetworkLocation>Work</NetworkLocation>
                    <SkipUserOOBE>true</SkipUserOOBE>
                    <SkipMachineOOBE>true</SkipMachineOOBE>
                    <ProtectYourPC>1</ProtectYourPC>
                </OOBE>
                <UserAccounts>
                    <LocalAccounts>
                        <LocalAccount wcm:action="add">
                            <Password>
                                <Value></Value>
                                <PlainText>true</PlainText>
                            </Password>
                            <Description></Description>
                            <DisplayName>Nguyen Tuan</DisplayName>
                            <Group>Administrators</Group>
                            <Name>Nguyen Tuan</Name>
                        </LocalAccount>
                    </LocalAccounts>
                </UserAccounts>
                <RegisteredOrganization>Blog Windows 10</RegisteredOrganization>
                <RegisteredOwner>Nguyen Anh Tuan</RegisteredOwner>
                <TimeZone>SE Asia Standard Time</TimeZone>
    <Themes>
                    <DesktopBackground>%windir%\system32\oobe\Background.png</DesktopBackground>
                    <ThemeName>HP</ThemeName>
                </Themes>
                <TaskbarLinks>
                    <Link0>microsoft.windowscommunicationsapps_8wekyb3d8bbwe!microsoft.windowslive.calendar</Link0>
                    <Link1>Microsoft.SkypeApp_kzf8qxf38zg5c!App</Link1>
     <Link2>Microsoft.ZuneMusic_8wekyb3d8bbwe!Microsoft.ZuneMusic</Link2>
                </TaskbarLinks>
          <FolderLocations>
                    <ProfilesDirectory>C:\Users</ProfilesDirectory>
                </FolderLocations>
            </component>
            <component name="Microsoft-Windows-Shell-Setup" processorArchitecture="amd64" publicKeyToken="31bf3856ad364e35" language="neutral" versionScope="nonSxS" xmlns:wcm="https://schemas.microsoft.com/WMIConfig/2002/State" xmlns:xsi="https://www.w3.org/2001/XMLSchema-instance">
                <AutoLogon>
                    <Password>
                        <Value></Value>
                        <PlainText>true</PlainText>
                    </Password>
                    <Enabled>true</Enabled>
                    <Username>Nguyen Tuan</Username>
                </AutoLogon>
                <OOBE>
                    <HideEULAPage>true</HideEULAPage>
                    <HideOEMRegistrationScreen>true</HideOEMRegistrationScreen>
                    <HideOnlineAccountScreens>true</HideOnlineAccountScreens>
                    <HideWirelessSetupInOOBE>true</HideWirelessSetupInOOBE>
                    <NetworkLocation>Work</NetworkLocation>
                    <SkipUserOOBE>true</SkipUserOOBE>
                    <SkipMachineOOBE>true</SkipMachineOOBE>
                    <ProtectYourPC>1</ProtectYourPC>
                </OOBE>
                <UserAccounts>
                    <LocalAccounts>
                        <LocalAccount wcm:action="add">
                            <Password>
                                <Value></Value>
                                <PlainText>true</PlainText>
                            </Password>
                            <Description></Description>
                            <DisplayName>Nguyen Tuan</DisplayName>
                            <Group>Administrators</Group>
                            <Name>Nguyen Tuan</Name>
                        </LocalAccount>
                    </LocalAccounts>
                </UserAccounts>
                <RegisteredOrganization>Blog Windows 10</RegisteredOrganization>
                <RegisteredOwner>Nguyen Anh Tuan</RegisteredOwner>
                <TimeZone>SE Asia Standard Time</TimeZone>
          <Themes>
                    <DesktopBackground>%windir%\system32\oobe\Background.png</DesktopBackground>
                    <ThemeName>HP</ThemeName>
                </Themes>
                <TaskbarLinks>
                    <Link0>microsoft.windowscommunicationsapps_8wekyb3d8bbwe!microsoft.windowslive.calendar</Link0>
                    <Link1>Microsoft.SkypeApp_kzf8qxf38zg5c!App</Link1>
     <Link2>Microsoft.ZuneMusic_8wekyb3d8bbwe!Microsoft.ZuneMusic</Link2>
                </TaskbarLinks>
    <FolderLocations>
                    <ProfilesDirectory>C:\Users</ProfilesDirectory>
                </FolderLocations>
            </component>
  </settings>
  <settings pass="generalize">
            <component name="Microsoft-Windows-PnpSysprep" processorArchitecture="amd64" publicKeyToken="31bf3856ad364e35" language="neutral" versionScope="nonSxS" xmlns:wcm="https://schemas.microsoft.com/WMIConfig/2002/State" xmlns:xsi="https://www.w3.org/2001/XMLSchema-instance">
                <PersistAllDeviceInstalls>true</PersistAllDeviceInstalls>
                <DoNotCleanUpNonPresentDevices>true</DoNotCleanUpNonPresentDevices>
            </component>
            <component name="Microsoft-Windows-PnpSysprep" processorArchitecture="x86" publicKeyToken="31bf3856ad364e35" language="neutral" versionScope="nonSxS" xmlns:wcm="https://schemas.microsoft.com/WMIConfig/2002/State" xmlns:xsi="https://www.w3.org/2001/XMLSchema-instance">
                <PersistAllDeviceInstalls>true</PersistAllDeviceInstalls>
                <DoNotCleanUpNonPresentDevices>true</DoNotCleanUpNonPresentDevices>
            </component>
        </settings>
    </unattend>
Cách chạy Sysprep kết hợp với tập tin trả lời
Chúng ta có 2 cách chạy Sysprep kết hợp với tập tin trả lời. Cách 1 chạy bằng giao diện trực quan và cách 2 chạy sysprep bằng dòng lệnh trong dấu nhắc lệnh cmd
Cách 1: chạy bằng giao diện trực quan
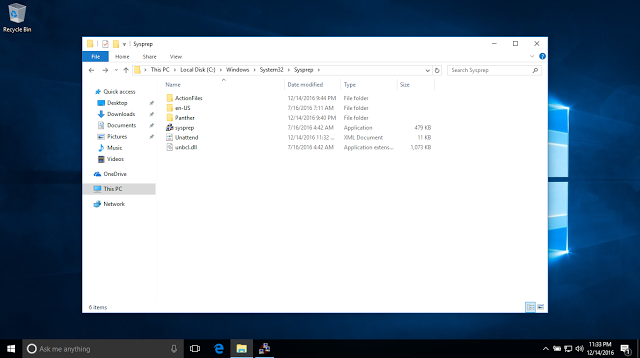
Công cụ Sysprep.exe được đặt mặc định trong đường dẫn C:\windows\System32\Sysprep. Nếu bạn muốn chạy giao diện trực quan thì truy cập đường dẫn này và chạy công cụ bằng quyền quản trị viên.
Tập tin trả lời phải được đặt tên là Unattend và được đặt trong cùng với thư mục của công cụ sysprep để khi công cụ chạy có thể nhận dạng được tập tin trả lời
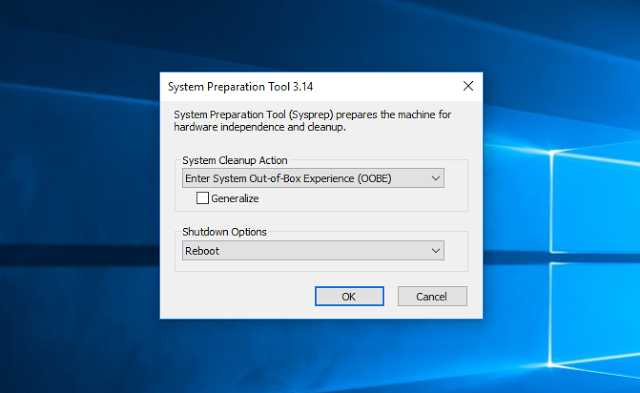
Chuột phải Sysprep.exe chọn Run as Administrator, tại giao diện tích chọn chế độ Out-Of-Box Experience (OOBE), bên dưới tích vào ô Generalize và trong phần Shutdown options chọn chế độ tắt máy, khởi động hay thoát sau khi công cụ sysprep chạy.
Sau khi lựa chọn xong bấm OK cho phép sysyprep chạy với lựa chọn của người dùng đã thiết lập.
Cách 2: Chạy Sysprep thông qua dòng lệnh trong dấu nhắc lệnh cmd
Cách này chúng ta sẽ sử dụng dấu nhắc lệnh để chạy sysprep với dòng lệnh. Và tập tin trả lời không nhất thiết phải tên Unattend là tên gì cũng được và lưu ở đâu cũng được ví dụ như USB chẳng hạn
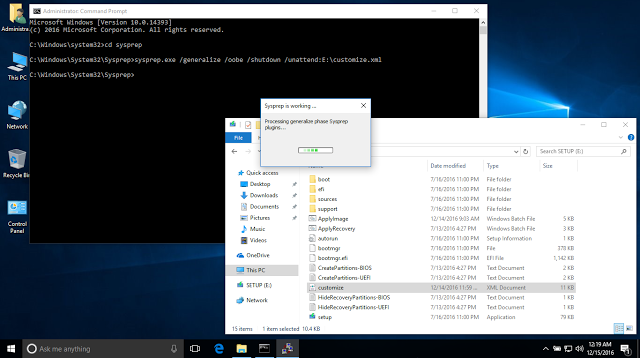
Khởi chạy dấu nhắc lệnh cmd bằng quyền Administrator sử dụng các lệnh bên dưới
cd sysprep

sysprep.exe /generalize /oobe /shutdown /unattend:E:\customize.xml
Với (E:) là ký tự ví dụ của USB và customize.xml là tập tin trả lời đang lưu trong đó.
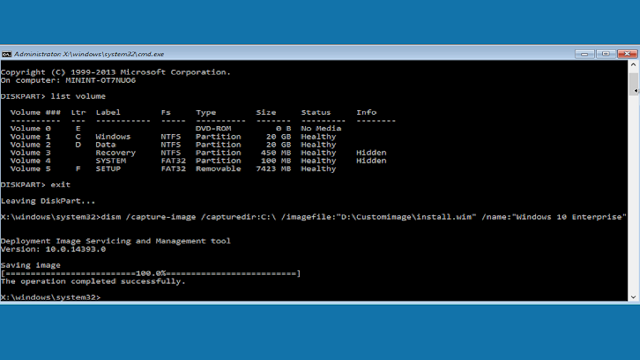
Sau khi chạy Sysprep bạn có thể khởi động vào Win PE tiến hành chụp lại hình ảnh và dùng hình ảnh này triển khai lên các máy tính khác
Sử dụng dòng lệnh trong dấu nhắc lệnh ví dụ
Dism /Capture-Image /CaptureDir:C:\ /Imagefile:"D:\Customimage\Install.wim" /Name:"Windows 10 Enterprise"
Trong đó:
(C:) là phân vùng cài đặt Windows 10 cần chụp
(D:) là phân vùng khác hoặc USB nhưng lưu ý nếu là USB thì phải định dạng NTFS để đảm bảo rằng tập tin gắn kết wim file lớn hơn 4gb
Install.wim: có thể đặt tên tùy ý nhưng phải có đuôi .wim
Windows 10 Enterprise: Tên này do bạn tự đặt cho phiên bản Windows 10 mà bạn cài trên máy.
 Sửa máy tính tận nơi tại TP.HCM ⭐GIÁ RẺ ⭐CHẤT LƯỢNG ⭐CHUYÊN NGHIỆP CÔNG TY TNHH TM-DV GIẢI PHÁP TIN HỌC LÊ NGUYỄN
